Tyler’s going to show you two basic DIY Hydroponic designs that you can make in your own home.
We include two different frame types in this video: a stand-alone PVC frame, and a wooden frame on wheels. Each one uses the same sump, same towers, and same irrigation.
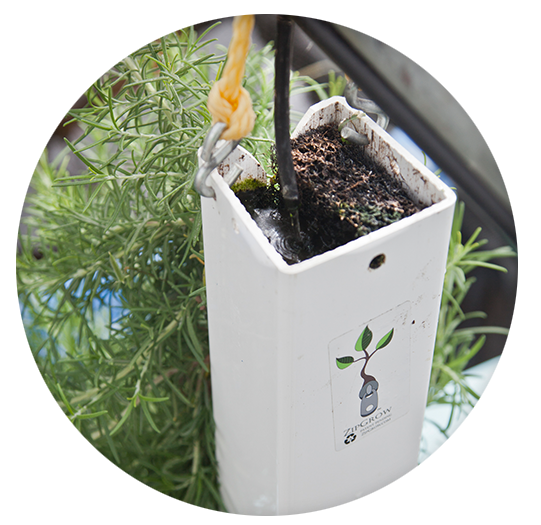
With the towers hanging over the sump, it’s easy to make a closed loop system. The pump in the sump irrigates the top of the towers, which drain back into the sump.
Spacing
To give your crops adequate space to grow and to give plenty of space to the lights, leave 15-20 inches between the back of one tower and the front of another. Give them 5-8 inches from side to side.
Make sure that the bin you use as your sump is wide and long enough to accommodate your towers with this spacing. Mark on the lid of your “sump” where you want the towers to hang.
With the spacing marked on the lid, cut out the holes in which the towers will rest. You’ll want the bottom inch or inch and a half of the tower to sit right inside the pump so that they hang securely without swinging around.
The height of frame will depend on the sump tank that you use. Our sump was 15 inches tall, so our towers were hanging at 56-57 inches above the ground. (Sump + 41 inches)
The PVC frame hydro system
Tools needed
- Whole saw/paddle bit 1” or 1 1/8” (size to dowel or conduit pipe)
- Hole punch for drippers
- Shears to cut poly & tote
- Sharpie
Materials Needed
- 1-18 Gallon tote for sump (23+ in. long for small crops, 27+ in. long for large crops, and at least 14 inches wide)
- 4-Pack of 5’ ZipGrow Towers
- ZipGrow™ Farm Wall LED, T5 Light Mounting Kit
- Danner Recirculating Water Pump — 500GPH
- 14 feet of of 1/2” black tubing (vinyl works best)
- 4 Drip emitters
- 4 feet of 1/4” Poly
- 2″ PVC. (Sizing dependent on sump size.) We used:
- (4) 56″ pieces
- (2) 24″ pieces
- (2) 36″ pieces
- (1) 18″ pieces
- (4) corner fittings
- (4) elbow fittings
- (6) t-fittings
Build a cross bar inside the frame and another extended from the frame give us space to hang our T5 lights. You’ll want to give the plants at least 12 inches from the lights (for smaller crops), and up to 18 inches (larger crops). This PVC system is especially compact, so it will be planted with smaller crops. (See what we did to adjust light distance on the wooden frame.)
The wooden frame hydro system
We used 2×4’s and scavenged steel conduit to build the second frame. This rack is build with the dimensions of the PVC rack, but we built a platform for the sump and put wheels on the bottom to make the system mobile.
We used the two lengths of steel conduit to attach lights, which we can move back and forth, different distances from our towers.
Tools Needed
- Drill/screw gun
- (55+) 2 1/2” Wood screws
- Whole saw/paddle bit 1” or 1 1/8” (size to dowel or conduit pipe)
- Wood saw
- Hole punch for drippers
- Shears to cut poly & tote
- Sharpie
Materials Needed
- 1-18 Gallon tote for sump (23+ in. long for small crops, 27+ in. long for large crops, and at least 14 inches wide)
- 4-Pack of 5’ ZipGrow Towers
- ZipGrow™ Farm Wall LED, T5 Light Mounting Kit
- Danner Recirculating Water Pump — 500GPH
- 14 feet of of 1/2” black tubing (vinyl works best)
- 4 Drip emitters
- 4 feet of 1/4” Poly
- Wood (we used 2×4’s) as follows:
- (4) 5’ uprights
- (4) 2’ ‘cross-members’ (width) The two top members will have two 1” holes to accommodate the light rails
- (4)3’ (length)
- (5) 21” (for sump to rest on)
- (3) 1’ (for lights to hand from & outside ‘cap’ to prevent rails from sliding)
- (1) 27” (caps the back of the light rails and prevents them from sliding out)
- (2) 1” dowels or conduit pipe at 38 1/4” but should be cut to specific length
- (4) casters
Setting up the irrigation
Once the frame was built, we used a 250 GPH Active Aqua submersible pump and a length of 3/4 inch poly tubing to run an irrigation line in a loop above our four towers. We marked the poly where it would be directly above the towers, punched holes in it, and inserted drip emitters.
With the drip emitters inserted, place the poly loop on the top of your frame and ziptie into place with the drip emitters hanging directly over the four towers.
Run the line down to the sump, where it will attach to the Active Aqua pump in the sump tank.
Mount lights and fill sump
Using the clips included with your T5 light rods, mount two lights to each of the cross bars (or the sliding board, depending on which frame you built). Alternate the male and female end of the light rods so that you can connect the two rods in each pair.
Fill the sump at least to above the top of your pump with a nutrient solution. We recommend Dyna Grow Liquid Nutrient Solution for hobby hydroponic growers. Add Dyna Gro at a 1 Tbsp/gallon water ratio.
Your system is ready!
This hydro system is just one way to save space and have fun as a hydroponicist. ZipGrow™ Towers make this system low maintenance; just check for leaks every now and then, top off the solution, and turn the lights on!
If you want to save yourself a couple of hours searching on the web for the parts, you can get several of the parts at once on our shop. Checkout the ZipGrow™ Towers, the pump, and light rods on your shop. You can thrift and salvage the rest like we did, or hit up your local hardware store!


